
Lesson #3 Green Screens
- infamousproduction0
- Mar 23, 2021
- 6 min read
Introduction: Quick Previous Lesson Reflection.
After the latest two lessons Jonny has delivered I am feeling a lot more confident with using After Effects. I definitely feel like things are slowly becoming clearer about what the software is capable of and I have a good indicator of my abilities so far.
I have thoroughly enjoyed Jonny's lessons, he's efficient and an excellent teacher I can see why Lee brought him in. I used one of his tips recently and bought an additional SSD to help with AE's performance, combined with some extra RAM my PC now runs the application far smoother with less crashes and less instances of freezing.
I was worried doing this module originally as I have next to no experience using AE, and little with editing as it was just a hobby before taking on University but my passion for it if anything has grew exponentially and I can't wait to see what I will be capable of at the end of the course.
Lesson #3: The Green Screen
I have decided to not go as in depth as I did with the prior two lessons but instead have decided to talk about what I felt was fun and challenging. Getting started then I just dragged all of the material I needed in, and followed along with Jonny's lesson adding the footage to AE.

The three components I would like to focus on are the creations of the mask, keying out the Green Screen and using the Keylight to blend the subject further to give a more seamless effect.

We had previously used this technique in last weeks lesson to give the text camouflage by masking out an area from the video we duplicated. In this example we are using this to cut out the unnecessary footage we need keeping it concise with the subject in mind. However, Jonny takes this to the text level showing us how to use the animation elements he touched upon in a much more interesting way.
Adjusting the Mask layer outline as the footage was moving to keep it concise to the subject was really cool and opened my eyes to a lot of practical usage with green screen that I didn't even think was possible.

As you can see I have included above the subject and the workflow to show the keyframes of where I adjusted the mask to keep the unnecessary stuff out. As the subject moved I made sure to adjust the mask where necessary to hide a blue motion track point that had been set up. Even though it is clear that this is a simple use of green screen, it is really amazing and I can see a lot of uses for this for my own future projects.
Keying out the Green Screen, Keylight 101
After I had the subject masked off and I was happy with the new animated features not added to the mask I continued on with Jonny's video dragging in the background image that he had included in his example.

This is the part I think I worried the most, as I mentioned I don't have a lot of experience with this programme so most of this I am doing for the first time but Jonny continues to provide excellent guides and even though I found this next section tough I thought it was really fun to experiment with.
Having gotten the background where it needed to be I adjusted the scale of the background image to give it a nicer fit eliminating the black boarders as you seen in the above image.
Jonny mentioned that a top tip of his is that when you are doing green screen work, a technique he uses is to make sure that the background screen is as congruent as possible. In short he refers to trying to get the green screen as solid a green as possible, that way when the colour is keyed out it will give a better result as the colour is more uniform instead of many shades of green.

Although at first glance there really isn't much of a difference it is certainly more of a brighter vibrant green, the adjusted values that I used did the job rather well as when I used the Keylight effect dropper and selected the colour it achieved a good result as you can see in the next image below.

As Jonny proceeds with his tutorial he pointed out that there were some elements that would need to be fixed, such as a little transparency with the subjects top (You could see some of the details of the street through the woman), as well as an outline around the subject that we would have to remove.
Making the subject clearer on top of the background
As you can see below the subject as a little bit of a bit of an outline, she kind of looks like a comic book character however Jonny explains that we can use Keylight to minimise this exposure and tidy up the transparency that I had mentioned prior.

The first thing that Jonny covered was switching Keylight's viewer setting from Final Result to Screen Matte. I thought that this view was super cool as it looks like one of the cameras ghost hunters would use to detect spirits, giving our subject the above look then transforming her into a silhouette.

The objective of this correction is to make the background as dark as possible and to make the woman to be one solid colour instead of there being streaks of grey. The grey represents areas that are transparent, so in order to make the subject one solid colour we would have to tweak some settings in order to give a more concrete effect making the woman looks like she belongs on the street.
I played around with the Screen gain, clip black and clip white to try to adjust the subject to where it needed to be, below are the settings that I used.

After applying these settings, the subject then turned out to look like this:

As you can see there is a big difference now, I was truly amazed by this. I have been a fan of effects for a long time, but seeing the background of the amount of work and effort that goes in to perfect every detail gave me a huge appreciation for visual effects artists and the countless hours they put in to hone their crafts.
The next thing was to remove the the black outline and make her look more human rather than a manga character. In Jonny's lesson he recommends using the Screen Matte Drop down and adjusting both the Screen Shrink/Grow and the Screen Softness. These two settings honestly didn't need that much tweaking, I think this could be due to the colour boost we did earlier to the green screen to make it easier to detect the subject.

Above you can see the values that I used to get rid of the outline, as you can see we didn't have to tweak it as much as other things so far but it gave the result of a very clear subject.

Wrapping Up
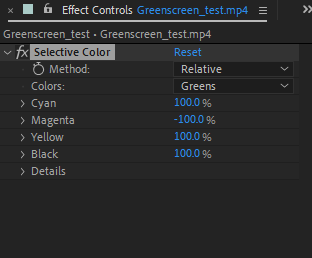
We also did motion track in this lesson, as well as a few other things from prior lessons but I didn't feel the need to include them as the subject in this case didn't really need as much work on those fronts due to the already set up Tracking Marker that was utilised in the lesson. I also added some colour correction to make the subject a bit more concrete in this learning example, tweaking the colours made the woman feel more at home in the final clip which will be at the end.
I honestly enjoyed this lesson the most, I am really excited to try the 4th as it seems to go into a lot more depth in this topic and I am very hyped to try it. I was extremely worried starting this module but as time goes on I feel this is something I would love to do for a living, it has opened my eyes to a lot of different applications that I can use this technique in.
There haven't really been many concerns as Jonny breaks down these videos really well, I look forward to learning more from him as the weeks continue.
Thanks for reading!


Comments